What is a Mini Quiz?
A Mini Quiz is an element that you can add to your Privy sign up displays; it’s a sleek way to make your displays more interactive and to gather invaluable information from your contacts at sign up. They tend to be most effective when used as the first step in a sign up display, followed by collecting email and/or phone number. The Mini Quiz journey doesn’t stop at sign up either — you can put this information to work by using it to segment your list and send personalized messaging to your audience!Use Cases
The nice thing about Mini Quizzes is that they can fit a variety of use cases, depending on your brand, what you sell, and who you’re selling to. Here’s some of our favorite ways that Mini Quizzes can be used:Shopping Preferences
Shopping Preferences
Ask your shoppers what collection(s) or theme(s) they’re most interested in so that you can make personalized product recommendations! Here’s some examples:
- Men’s, Women’s, or both
- Silver or gold
- Scent type
Customer Attributes
Customer Attributes
Ask your shoppers a question about who they are so you know what type of content would be best suited for them.Here’s some examples:
- Professional or student
- Age range (18-24, 25-34, etc…)
- Zodiac sign
Just for fun!
Just for fun!
Include a lighthearted quiz that you can use for fun campaign content and Subject Lines in the future!
- Breakfast, lunch, or dinner? (for brands in the food industry)
- Who are you rooting for in the Super Bowl?
- Favorite season (for clothing brands)
Add a Mini Quiz to your display
Privy has a few different Templates that include mini quizzes for you to customize. You can choose one of these templates, or add a mini quiz to an existing draft or display. To add a mini quiz to a display:- Head to Convert > All Displays.
- Select an existing display, or Create New Display.
- Click Add Step at the bottom of the display builder and select Mini Quiz from the menu.
Customize your Mini Quiz
To edit your Mini Quiz, click directly on your Mini Quiz element. All of its settings will appear on the right side of the editor. Under the Mini Quiz settings, you will be able to specify:Property Name
Property Name
This will be the name of your Custom Field, which will appear in your contact’s profile, in contact CSV exports, and will be mapped to third party providers (if you’re syncing to a Linked Account).
Manage Options
Manage Options
These are the options that will appear on your sign up display. Upon selecting an option, this value will appear as an Attribute in your contact’s profile. You can create Custom Segments using this Custom Field value (which we will cover below).
On-Click Action
On-Click Action
This specifies what happens when an option is clicked. This is set to “Transition to: next display” by default. This means selecting an option will seamlessly move the sign up to the next step.
Using your Mini Quiz data
Once you’ve launched a display with a Mini Quiz and have started collecting answers from your sign ups, you can start building your Custom Segment(s). To build a segment with your Mini Quiz custom fields:- Head to Contacts > Segments and click Create Segment in the upper right.
- Give your segment a name.
- Go to choose your category for the segment, and select Custom Field from the dropdown menu.
- In the following dropdown, search for and select the Property Name that you chose for your Mini Quiz.
- Select “text” and “begins with” from the following dropdowns.
- Finally, type in the value of the Option you’d like to segment by.
Best Practices
Depending on your use case, it may be smart to add a Purchase History condition to your segment to pair with your Mini Quiz data. For example, if you’re asking whether they prefer Gold or Silver jewelry, you might want to create a segment of people who answered “Gold” on your Mini Quiz along with anyone who has purchased from your Gold collections before.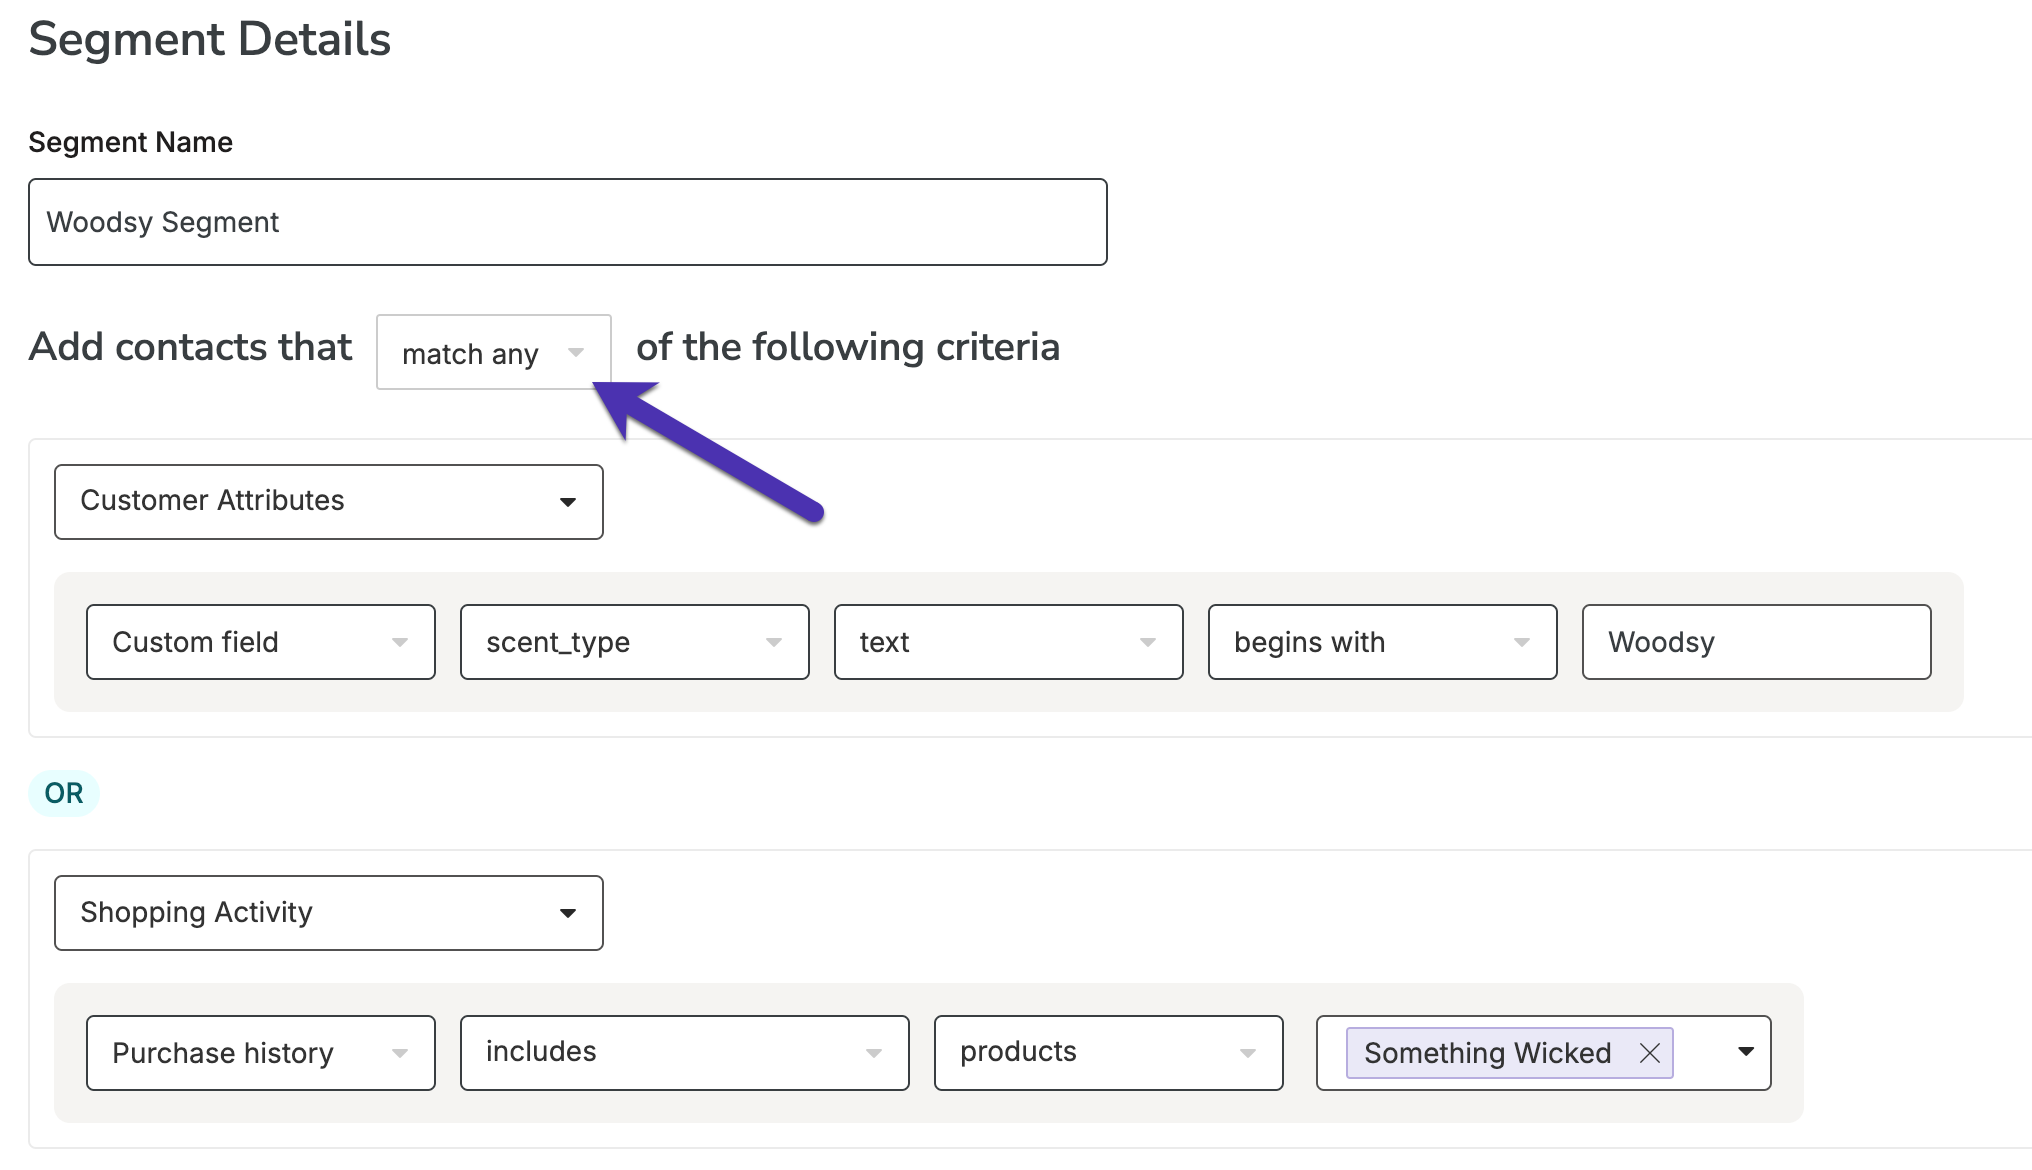
Engaging with your Mini Quiz segment
The information you collect through your Mini Quiz can be invaluable in targeting your messaging. The more you know about your audience, the more equipped you are to send them content that you know they’ll find interesting. This can work wonders for your engagement metrics, and it increases the likelihood that you’ll secure an order. Consider targeting your Mini Quiz segment(s) with the following campaigns:- New product launches that align with their preferences
- Promotions on specific items that align with their preferences
- Newsletter / lifestyle content that speaks to who they are
- Product spotlights that align with their preferences
- Super exclusive flash deals