> ## Documentation Index
> Fetch the complete documentation index at: https://help.privy.com/llms.txt
> Use this file to discover all available pages before exploring further.
# Sync Contacts to Emotive
> Learn how to connect Privy and Emotive and start syncing new SMS contacts.
To sync the contacts captured by your Privy displays into your Emotive account, you will first need to integrate the two accounts, then set up sync rules on each of your displays.
## Features of the integration
The Privy \<> Emotive integration allows you to sync SMS contacts collected via Privy Display, and:
* Choose which Welcome Flow they should enter after signup
* Sync the master or unique coupon code generated at signup
* Sync custom properties collected at time of signup (via [Mini Quiz, Radio Button, or Checkboxes](https://help.privy.com/docs/learn/displays/form-fields-and-elements#form-fields))
## Setting up the integration
To link your Privy account with your Emotive account:
1. Click on your business name in the upper right corner of your dashboard. Select the **Integrations** option from the dropdown menu.
2. Select **Emotive** from the list of *Available Integrations.*
3. Enter your email address and your Personal Access Token from Emotive, then click **Link Account**.
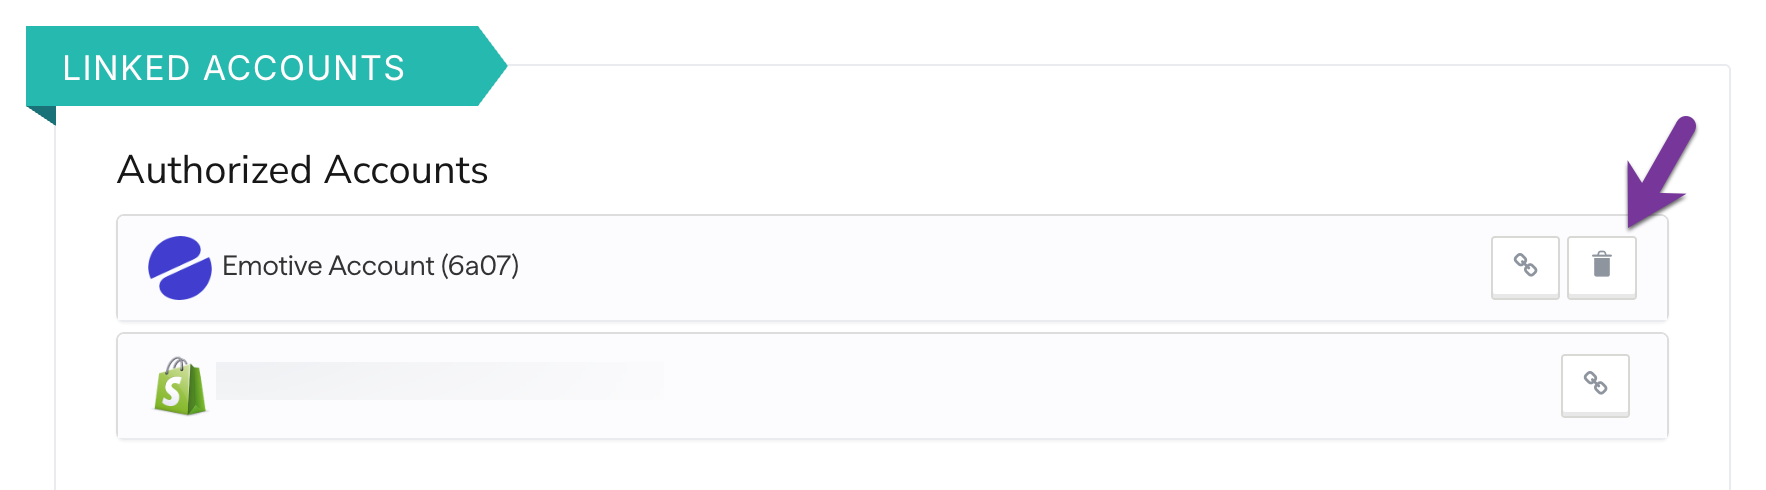
All set! Emotive should now appear as a linked account in the *Authorized Accounts* section.
A Personal Access Token is also known as an "API Key" in Emotive. Your API Keys can be found by heading to **List Growth > Integrations** on the left side of your Emotive dashboard.
If you have an existing API Key, you can locate it on this page, then copy & paste it into the Personal Access Token field in Privy.
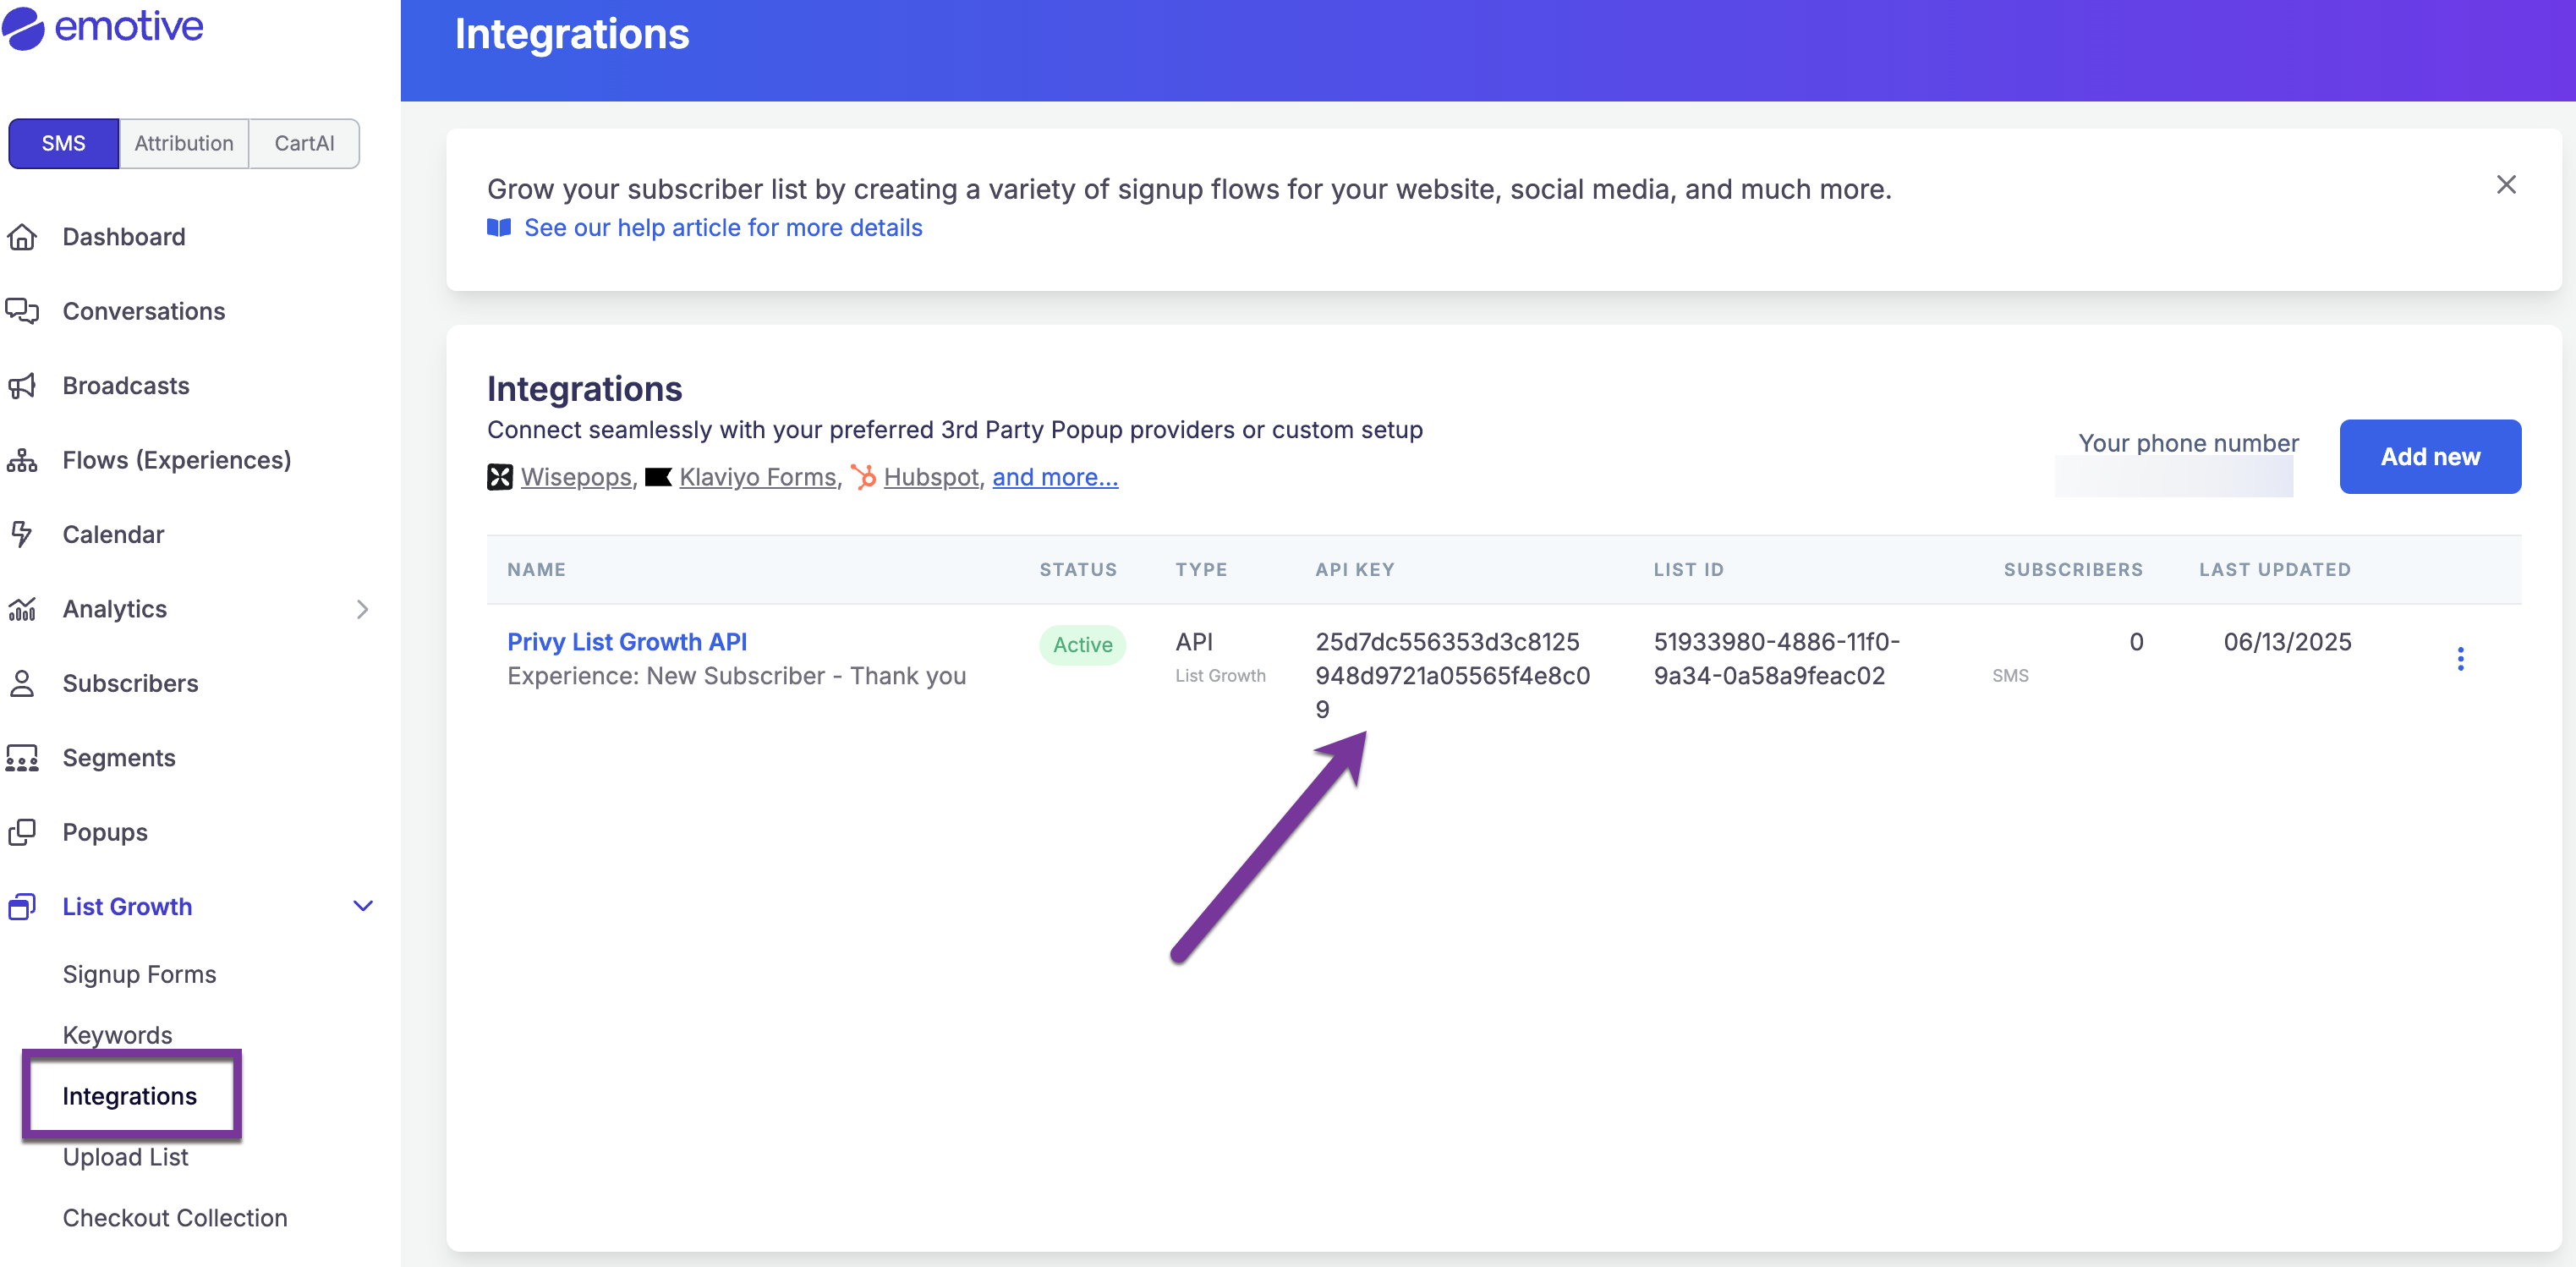 If you need to create a new API Key, you can do so by following these instructions:
* If you're creating your very first API Key, select **Start Here** in the middle of the screen. If you have existing API Keys but you'd like to create a new one, click **Add New** in the upper right.
* Customize your *Signup Flow Name* on the following screen.
* Select your **Welcome Message** from the dropdown at the bottom of the page.
* Click **Next** once you're ready, and copy your new API Key.
## Add a sync rule to your displays
To add a sync rule to a display so that the collected contacts sync to Emotive:
1. Navigate to your [Displays](https://dashboard.privy.com/displays) from your dashboard.
2. Select the display you’d like to sync and navigate to the **Settings** step of the display builder.
3. Click to expand **Advanced Settings** at the bottom left of the page. Scroll to the **Sync Integrations** section.
4. Select **Emotive** from the dropdown menu, configure the presented options, and **Save**.
This display’s signups will now sync to Emotive!
**Note:** Sync rules must be set up for each individual display.
### Sync Coupon Codes to Emotive
To sync master or unique coupon codes from Privy to Emotive, you must:
1. Have a coupon code attached to your Privy display
2. Collect the "Coupon" Profile Attribute in your display's settings
To attach your coupon code to your display and collect the "Coupon" Profile Attribute:
* Head to your display's **Settings**.
* Select the **Coupon** card and choose the desired coupon code from the dropdown menu.
* Next, select **Show Advanced Settings** in the lower left.
* Select the **Profile Attributes** card, click **Collect New Attribute**, and choose "Coupon" as the *Attribute to be collected*.
* **Save** your changes.
All set! The coupon code associated with each signup will now sync over to Emotive.
## Removing the integration
If you need to disconnect your Privy and Emotive accounts, follow these steps:
1. Click on your business name in the upper right corner of your Privy Dashboard. Select **Integrations** from the menu that appears.
2. Locate your Emotive integration under the *Authorized Accounts* section and select the **Delete** icon.
If you need to create a new API Key, you can do so by following these instructions:
* If you're creating your very first API Key, select **Start Here** in the middle of the screen. If you have existing API Keys but you'd like to create a new one, click **Add New** in the upper right.
* Customize your *Signup Flow Name* on the following screen.
* Select your **Welcome Message** from the dropdown at the bottom of the page.
* Click **Next** once you're ready, and copy your new API Key.
## Add a sync rule to your displays
To add a sync rule to a display so that the collected contacts sync to Emotive:
1. Navigate to your [Displays](https://dashboard.privy.com/displays) from your dashboard.
2. Select the display you’d like to sync and navigate to the **Settings** step of the display builder.
3. Click to expand **Advanced Settings** at the bottom left of the page. Scroll to the **Sync Integrations** section.
4. Select **Emotive** from the dropdown menu, configure the presented options, and **Save**.
This display’s signups will now sync to Emotive!
**Note:** Sync rules must be set up for each individual display.
### Sync Coupon Codes to Emotive
To sync master or unique coupon codes from Privy to Emotive, you must:
1. Have a coupon code attached to your Privy display
2. Collect the "Coupon" Profile Attribute in your display's settings
To attach your coupon code to your display and collect the "Coupon" Profile Attribute:
* Head to your display's **Settings**.
* Select the **Coupon** card and choose the desired coupon code from the dropdown menu.
* Next, select **Show Advanced Settings** in the lower left.
* Select the **Profile Attributes** card, click **Collect New Attribute**, and choose "Coupon" as the *Attribute to be collected*.
* **Save** your changes.
All set! The coupon code associated with each signup will now sync over to Emotive.
## Removing the integration
If you need to disconnect your Privy and Emotive accounts, follow these steps:
1. Click on your business name in the upper right corner of your Privy Dashboard. Select **Integrations** from the menu that appears.
2. Locate your Emotive integration under the *Authorized Accounts* section and select the **Delete** icon.